How To Clean Fuel Tanks?
24th May 2024
Is your car not performing as it used to? The culprit might be hiding in your fuel tank. Over time, residues such as rust and old fuel can build up, clogging your system and dulling your engine’s performance. A clean fuel tank is key to a smooth and efficient drive. Learn how to clean your fuel tank with our step-by-step guide for optimal performance.
Get ready to roll up your sleeves as we dive into the nitty-gritty of fuel tank cleaning. From why it’s essential, to how you can do it yourself without a hitch, we've got you covered in our DIY fuel tank cleaning guide.
Let’s get started!
Understanding Fuel Tank Contamination
Fuel tank contamination can seriously hinder your vehicle's performance, leading to inefficient fuel use and potential engine damage. Contaminants like water, sediment, and biological growth disrupt the fuel quality, posing risks to the fuel injection system and overall engine health.
Understanding and managing these contaminants is crucial for maintaining your vehicle’s efficiency and longevity, ensuring your fuel tank stays clean and your engine runs smoothly.
Signs of Fuel Tank Contamination:
Engine Misfires or Stalling
If your engine frequently misfires, stalls, or experiences difficulty starting, it could be a sign that contaminants in the fuel tank are disrupting the flow of fuel to the engine.
Decreased Fuel Efficiency
A sudden drop in fuel efficiency can indicate that impurities within the fuel tank are affecting the combustion process, causing your vehicle to consume more fuel than usual and highlighting the need for a fuel tank cleaning.
Unusual Noises from Fuel Tank
Sounds like sputtering or knocking from the area of the fuel tank when the engine is running might suggest the presence of particles or water in the fuel, which can create irregular engine sounds and indicate a need to clean the fuel tank.
Visible Sediment in Fuel
During fueling or maintenance, if you notice visible particles of sediment in the fuel, this is a clear indication of contamination within the fuel tank, signaling it's time to clean your fuel tank.
Tools Required To Clean Fuel Tanks
Cleaning a fuel tank effectively requires specific tools to ensure the job is done safely and thoroughly. Here are some essential tools you'll need:
Fuel Siphon Pump
A siphon pump is crucial for safely removing fuel from the tank without spills or exposure to hazardous fumes. Opt for a manual or electric model based on your preference and the volume of fuel to be transferred, ensuring a safe and efficient fuel tank cleaning process.
Pressure Washer
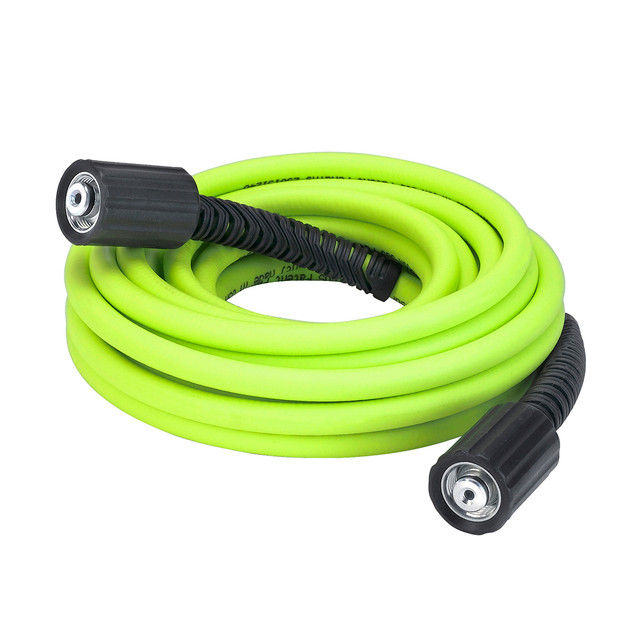
A pressure washer uses high-pressure water spray to effectively remove dirt, sludge, and residue from the interior surfaces of the tank. Ensure it has adjustable settings to control the intensity for different contamination levels, making the fuel tank cleaning process more effective.
Air Compressor
An air compressor is used to dry out the interior of the tank after washing, preventing rust and corrosion. It should have sufficient pressure output to thoroughly blow out moisture from corners and crevices, ensuring your fuel tank is completely dry.
Tank Cleaning Solution
Choose a cleaning solution formulated specifically for fuel tanks to help break down oil residues, rust, and sludge. Ensure it’s compatible with your tank’s material to avoid any damage.
Protective Gear
Protective gear, including chemical-resistant gloves, safety goggles, and a respirator, is essential to safeguard against chemical burns, inhalation of fumes, and other hazards during the cleaning process. Ensure they meet safety standards for chemical handling to protect yourself while cleaning the fuel tank.
How To Clean Fuel Tanks?
Cleaning your fuel tank is a crucial maintenance task that can improve your vehicle’s performance and longevity. Here’s a detailed step-by-step guide on how to clean a fuel tank effectively:
Step 1: Prepare Your Workspace
Before starting the fuel tank cleaning process, it's crucial to prioritize safety. Choose a well-ventilated workspace to mitigate the risk of inhaling harmful fumes. Equip yourself with protective gear such as gloves, safety goggles, and a respirator to shield against chemical exposure and debris.
Next, prepare by gathering all necessary tools and materials for the job. You’ll need a fuel siphon pump for draining the tank, a pressure washer and air compressor for cleaning and drying, tank cleaning solution for effective degreasing, an inspection camera to check the tank’s interior, and a container to safely hold the extracted fuel.
Step 2: Drain the Tank
Start by draining the fuel tank using a siphon pump. Connect the pump to both the tank and a storage container, then carefully transfer as much fuel as possible to avoid waste and environmental hazards, an essential step in the fuel tank cleaning process.
Make sure to extract all the fuel to ensure a thorough and effective cleaning process. Properly removing the fuel is crucial to prevent spills and maintain a clean, safe workspace, especially when performing a DIY fuel tank cleaning.
Step 3: Remove the Tank
For comprehensive cleaning, remove the fuel tank from your vehicle. First, disconnect the fuel lines carefully to prevent any leakage. Then, remove the tank straps that secure the tank to the vehicle, and gently lower the tank to a stable, flat surface, ensuring a thorough fuel tank cleaning.
Always refer to your vehicle’s service manual for specific instructions tailored to your model. This ensures that you handle each component correctly and
Step 4: Wash the Tank
Fill the tank with a cleaning solution designed specifically for fuel tanks to break down sludge and residue. Allow the solution to soak for the duration specified by the manufacturer, ensuring that it thoroughly penetrates and loosens the contaminants, making the fuel tank cleaning process more effective.
After the soaking period, use a pressure washer to rinse the inside of the tank. Direct the spray to reach all corners and surfaces, effectively removing any remaining dirt and grime. This step is crucial for ensuring the tank is completely clean.
Step 5: Inspect the Interior
After cleaning, thoroughly inspect the interior of the fuel tank to ensure no rust, corrosion, or damage remains. This examination is vital as it helps identify any areas that might require further cleaning or even repairs to prevent future issues.
Use a bright flashlight to illuminate the tank’s interior and visually check every surface. Pay close attention to seams and welds where corrosion is more likely to develop, ensuring that the tank is in optimal condition before reinstallation after cleaning the fuel tank.
Step 6: Dry the Tank
After cleaning, thoroughly dry the inside of the fuel tank using an air compressor. Direct the airflow to cover all internal surfaces, ensuring that no moisture remains. This step is crucial to prevent rust and corrosion, which can compromise the tank's integrity.
Ensure that the tank is completely dry by checking all corners and crevices for any residual moisture. A well-dried tank reduces the risk of future contamination and extends the lifespan of the fuel system.
Step 7: Reassemble and Refill
Once the fuel tank is completely dry, proceed to reinstall it in your vehicle. Carefully align and secure it using the original tank straps and reconnect all fuel lines. This ensures that the tank is properly positioned and securely fastened, preventing any movement or leaks during operation.
After reinstallation, refill the tank with clean, fresh fuel. This final step is essential to ensure that your vehicle is ready to operate efficiently. Double-check all connections for leaks to guarantee a safe and successful completion of the maintenance process.
Step 8: Test the Vehicle
After refilling the fuel tank, start your vehicle's engine to test its functionality. Listen for any unusual sounds and observe the engine's performance to ensure that it runs smoothly. This check helps verify that the fuel system is operating correctly without any issues.
During this initial test, also inspect for any leaks around the fuel tank and lines. Any dripping or unusual odors could indicate that connections were not secured properly during reassembly, requiring immediate attention to prevent further complications.
FAQs
1. Can I put fuel cleaner in a full tank?
Yes, you can add fuel cleaner to a full tank. It's effective in helping the cleaner evenly distribute throughout the fuel system. Just ensure you use the correct amount recommended for your tank's capacity.
2. When to clean the fuel injection system?
Clean the fuel injection system every 15,000 to 30,000 miles to maintain optimal engine performance. Regular cleaning helps prevent buildup and ensures smoother operation. Additionally, perform cleaning if you notice issues like rough idling or poor acceleration.
Sign Up For JB Tools And Start Saving For Your DIY Projects
JB Tools offers a wide range of high-quality tools perfect for tackling your fuel tank cleaning project at discounted prices. From fuel siphon pumps and pressure washers to air compressors and inspection cameras, you'll find everything you need to ensure a thorough and effective cleaning. These discounts make it easier and more affordable to gather all the necessary equipment for this essential maintenance task.
By signing up for the JB Tools newsletter, you'll gain access to special discounts on tools ideal for your DIY projects. This opportunity not only allows you to save money but also keeps you informed about the latest deals and new tools that can enhance your DIY toolkit. Start saving today and make your next project a success with the best tools at great prices.


