
How To Fix Squeaky Stairs
12th May 2024
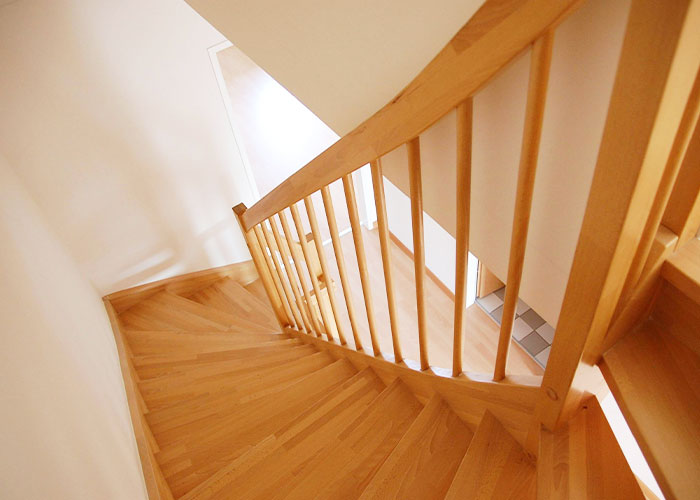
Do your stairs creak more than usual when you walk on them? This common issue can be particularly annoying in a quiet home, but fortunately, it's usually easy to remedy on your own.
Before you call in a professional, it's worth trying a few simple fixes yourself. In this blog post, we'll explore why stairs squeak and offer straightforward solutions to help you restore peace.
Let's begin by understanding what causes stairs to squeak?
What Causes Stairs to Squeak?
Over time, natural movement and pressure can lead to squeaks in both hardwood floors and staircases. Stairs can start to squeak for several reasons, often related to the natural wear and tear of the materials used in their construction. Here are some common causes:
- Loose Treads or Risers: Over time, the treads—the parts you step on—and risers—the vertical sections between each step—can loosen. This is often due to the wood shrinking and expanding with changes in humidity, which can cause nails and screws to loosen.
- Inadequate Support: If the stringers (the long boards that support the treads and risers) are not providing enough support, the stairs may begin to move slightly when they are stepped on, resulting in squeaking.
- Worn-Out Fixings: Over time, the nails, screws, or staples that hold the stairs together can corrode or wear out. As these fasteners become less effective, movement increases between parts, causing noise.
- Friction Between Components: Sometimes, the squeaking sound comes from wood rubbing against wood or against another material, like metal fasteners. This friction can occur because of gaps that form as the staircase materials settle or wear down.
- Age of the Stairs: Older staircases are more prone to squeaking simply because they've been subjected to years of use. The materials may have weakened, or previous repairs might no longer hold effectively.
How To Fix Squeaky Stairs - A Step by Step Guide
Fixing squeaky stairs involves addressing both the front (treads and risers) and the back (stringers and supports) of the staircase. Each area requires specific approaches based on the structure of the stairs and the materials used. Here's a detailed, step-by-step guide to help you eliminate those annoying squeaks:
Front of the Stairs: Treads and Risers
Step 1: Tighten the Fasteners
Begin by identifying any loose screws or nails in the treads and risers. Remove old nails using a claw hammer($8), ensuring you support the wood to prevent damage. Replace old nails with quality screws($20), as screws tend to hold wood together tighter and longer than nails. Choose screws that are long enough to go through the tread and deep into the riser or stringer beneath. Make sure they do not protrude out the back, which could be hazardous.
Step 2: Use Wood Glue
For joints that are not fully detached but still move and squeak, apply a high-quality wood glue($3) to securely fix the problem. Use a syringe for precision to inject glue into the crevices between the treads and risers. Ensure the glue penetrates deep into the joint for a solid bond. Clean up any glue that seeps out with a damp cloth to prevent a messy finish.
Step 3: Add Shims
Identify gaps causing squeaks and fit wooden shims into these spaces. Slide the shims into the gap between the tread and riser until snug. Use a hammer to gently tap the shims into place, ensuring they're secure but not forcing them too hard as this could damage the wood. Once in place, use a utility knife to trim any part of the shim that extends beyond the edge of the tread or riser.
Back of the Stairs: Stringers and Supports
Step 1: Check and Reinforce Stringers
Inspect the stringers for any signs of movement or weakness where they connect to the treads and risers. Secure these joints with L-brackets for additional support. Position the brackets so they bridge the connection points, and use a drill to attach them firmly with screws. Ensure the bracket is flush with the wood surfaces to avoid any protrusion that might interfere with the staircase’s function.
Step 5: Secure with Construction Adhesive
Apply a bead of construction adhesive($6) along the seams where the stringers connect to the treads and risers. Use a caulking gun for an even and controlled application. The adhesive should cover the entire seam to fill any gaps and provide a strong bond. Allow the adhesive to dry according to the instructions on the packaging, typically taking about 24 hours for full strength.
Step 6: Inspect and Tighten from Below
From underneath the stairs, tighten all visible screws and bolts that connect the stringers, treads, and risers. If any screws are loose, use a screwdriver or drill to tighten them securely. Replace any missing or rusted screws with new ones that match the size and length needed for your stair materials. Tightening from below helps ensure that all parts are firmly connected, reducing movement and squeaking.
JB Tools Is Offering O'BERRY Tools Is Offering Kits To Fix Squeaky Stairs
JB Tools now offers the O'Berry Tools' squeaky wood floor repair kit. These comprehensive kits are designed to provide all the necessary tools and materials to securely silence squeaks and creaks. Whether you're a DIY enthusiast or a novice, these kits make stair repairs straightforward and efficient, allowing you to fix the problem from above without needing to access the underside of your stairs. Perfect for quick home improvements, these kits are a must-have for anyone looking to restore peace and stability to their steps.