
How To Check Coolant Level?
24th May 2024
The coolant, also known as antifreeze, plays a pivotal role in preventing your engine from overheating and freezing. Regular coolant level checks can help you avoid costly repairs and keep your vehicle in good running condition.
In this blog, we will guide you through the steps to check your vehicle’s coolant level effectively. Before we jump into the process, let’s first understand what the coolant level is!
What is the coolant level?
The coolant level is a measure of the antifreeze present in your vehicle's cooling system, essential for regulating engine temperature. It prevents the engine from overheating in hot conditions and freezing in cold ones. Regularly monitoring the coolant level is crucial for maintaining optimal engine performance and longevity.
Maintaining the proper coolant level also helps prevent internal corrosion and damage to the engine and its components. By ensuring the coolant is at the correct level and in good condition, you safeguard your vehicle against costly repairs and extend its operational life.
How To Check Coolant Level: A Step-by-Step Guide
Checking the coolant level in your vehicle is a straightforward process that can be done at home with a few simple steps. Here’s how to ensure your coolant is at the right level to keep your engine running efficiently and safely, ensuring the best car maintenance practice:
Before Starting Ensure Safety
Ensure the vehicle is parked on a flat surface and the engine is completely cool. Opening the radiator or coolant reservoir on a hot engine can cause injuries from escaping steam or hot coolant. Always wear protective gloves and eyewear when handling engine coolant, as it can be hazardous to your health if mishandled. Safety is a crucial aspect of how to check coolant level in a car.
Step 1: Locate the Coolant Reservoir
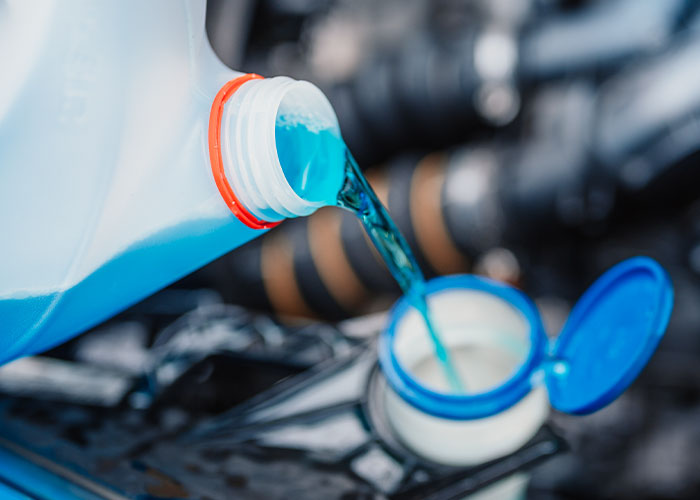
Open the hood and locate the coolant reservoir, typically made of clear plastic with "Min" and "Max" level markings. This container is usually positioned on the side of the engine bay for easy access when you need to check coolant level in your car.
Ensure the area around the reservoir is clean to prevent any debris from entering the system when you add coolant.
Step 2: Check the Coolant Level
Visually inspect the coolant level through the reservoir. The coolant should be between the minimum and maximum marks. If it’s below, it needs topping up with the appropriate type of coolant specified by your vehicle's manufacturer.
Regular checks can help catch leaks early, as consistent drops in coolant levels might indicate a problem in the system that needs attention.
Step 3: Add Coolant if Necessary

If the coolant level is low, carefully add a pre-mixed coolant solution to the reservoir. Continue filling until the fluid reaches the "Max" line, ensuring you use the coolant type specified by your vehicle's manufacturer to avoid any chemical mismatch that could damage the system. This step is critical for proper vehicle maintenance.
Pour the coolant slowly to minimize the risk of splashing, which can be hazardous. After adding, wait a moment to allow the coolant to settle, then double-check to ensure the level is stable at the "Max" mark, adjusting as necessary to achieve the correct fill. Following this step ensures an accurate check of coolant levels.
Step 4: Monitor the Coolant Level
After driving your vehicle for a day or two, open the hood again and recheck the coolant level at the reservoir. This follow-up check is crucial to ensure that the coolant is not only filling the system but also remaining at the correct level, indicating no leaks or consumption issues. This practice is key to effective car maintenance.
If you notice that the coolant level continues to decrease after multiple checks, it's important to consult with a professional mechanic. Persistent drops in coolant level could signify underlying issues such as leaks in the radiator, hoses, or engine block that require immediate attention to prevent engine damage. Identifying these issues early can save you from more costly repairs.
Why Are Low Coolant Levels Dangerous for Your Vehicle?
Low coolant levels in your vehicle can lead to a variety of serious problems that can compromise both the performance and longevity of your engine. Here’s why maintaining the correct coolant level is crucial:
Engine Overheating
Without enough coolant, your engine cannot dissipate heat effectively. This can cause the engine to overheat, leading to potential engine damage such as warped heads, blown head gaskets, and in severe cases, complete engine failure. Ensuring the correct coolant level is essential to prevent these issues.
Corrosion
Coolant contains additives that protect the engine and its components from corrosion. Low coolant levels can lead to increased corrosion, which damages the radiator, water pump, and other critical components of the cooling system. Regularly checking your coolant level is crucial for maintaining engine health.
Poor Heating Performance
The coolant also plays a vital role in your vehicle’s heating system by transferring heat from the engine to the heater core. Low levels can result in inadequate heating inside the vehicle, which can be particularly uncomfortable in cold weather. Ensuring the right coolant level helps maintain comfort and safety.
Increased Wear and Tear
Coolant provides lubrication to parts of the cooling system, such as the water pump. A low coolant level means less lubrication, leading to increased wear and a shorter lifespan for these components.
Engine Seizure
Running with a critically low coolant level can cause the engine’s temperature to rise excessively and rapidly. This can lead to the engine seizing, which often requires expensive repairs or even a complete engine replacement.
Different Coolant Color Meaning
The color of coolant in your vehicle isn't just for aesthetics; it indicates the type of coolant formula and the specific additives it contains. Understanding the different coolant colors can help you choose the right type for your vehicle and avoid mixing incompatible types. Here’s a brief overview of what some common coolant colors typically mean:
1. Green Coolant
This is the most traditional color and generally indicates an inorganic additive technology (IAT) coolant. It's typically used in older models and should be changed every two to three years.
2. Orange Coolant
Often signifies that the coolant uses organic acid technology (OAT). It's designed for newer vehicle models and typically has a longer life span, usually requiring a change every five years.
3. Yellow Coolant
This color usually represents a hybrid organic acid technology (HOAT), which is a combination of IAT and OAT technologies. It's suitable for newer and older vehicles and also has a long service life.
4. Pink or Red Coolant
These colors often indicate a coolant that uses a phosphate-enhanced OAT formula, which is particularly common in Asian vehicles. Like HOAT, they are designed to last long but should not be mixed with other types.
5. Blue Coolant
Typically found in some European and Japanese vehicles, blue coolant is another variation of OAT and is designed for specific engine types and materials used in these vehicles.
Shop Top Quality Coolants With JB Tools At Discounted
Shop top-quality coolants at JB Tools and enjoy discounted prices on a wide range of products. Whether you need green, orange, or any other type of coolant, JB Tools has you covered. Benefit from our expert selection and great deals to keep your vehicle running smoothly. Ensure your engine’s longevity and performance with our trusted coolant solutions.