
How To Replace Head Gasket?
16th Jul 2024
Is your car losing coolant but you can’t spot a leak? It could be a head gasket replacement issue, which prevents coolant from leaking externally but allows it to seep internally, causing serious engine problems if not addressed promptly. Recognizing the signs early can save you from more severe engine damage.
If you notice white smoke from the exhaust or oil contamination — where it appears milky — you might need to replace a blown head gasket. These symptoms suggest that the integrity of the head gasket has been compromised, affecting engine performance.
In this blog, we will explore how to effectively tackle and repair a head gasket leak. We’ll guide you through each step of the process, ensuring you have the knowledge to handle this critical repair. Whether you’re a seasoned DIYer or a first-timer, you'll find these insights invaluable.
When to Replace Head Gasket?
You should consider replacing a head gasket if you notice any of the following signs, which can indicate that the head gasket is failing or has failed:
- Overheating Engine: One of the most common signs: an engine that overheats quickly. This can occur because the head gasket seal is crucial in maintaining proper coolant flow through the engine.
- White Smoke from Exhaust: White smoke emitting from the exhaust, especially in large amounts, can indicate that coolant is leaking into the combustion chamber and burning off as steam. This is a clear sign you might need to replace a blown head gasket.
- Oil Contamination: Also known as "milkshake," this happens when coolant mixes with the engine oil, creating a milky, light-colored residue under the oil cap or on the dipstick. This contamination can severely damage the engine if not addressed, pointing to a need to repair head gasket leak.
- Loss of Coolant: If your coolant level drops frequently without any signs of an obvious leak (puddles under the vehicle), it could be leaking internally due to a compromised head gasket. This is another indicator for the need to replace the head gasket.
- Poor Engine Performance: A blown head gasket can lead to compression loss, significantly reducing engine power and efficiency. This performance drop often suggests it’s time to replace a blown head gasket to restore optimal engine function.
- Bubbles in the Radiator or Coolant Reservoir: The presence of bubbles or excessive frothing in the radiator or coolant overflow tank is a sign of combustion gases leaking into the cooling system. This issue should prompt a repair head gasket leak.
These symptoms suggest serious issues that need prompt attention to prevent further damage to the engine. Replacing a head gasket is a critical repair that restores the engine's integrity and performance.
Tools You Need To Replace Head Gasket
Torque Wrench
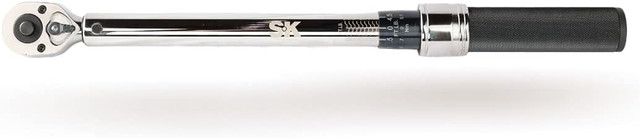
This tool is critical for applying the precise amount of torque to the head bolts, which is vital for ensuring an even and secure seal on the new head gasket. An improperly torqued head gasket can lead to engine failure, making the torque wrench indispensable for this task.
Socket Set

Comprehensive and versatile, a good quality socket set allows you to handle various sizes of nuts and bolts during the disassembly and reassembly of engine components. This set should include both standard and deep sockets to reach bolts of different lengths and locations.
Wrench Set
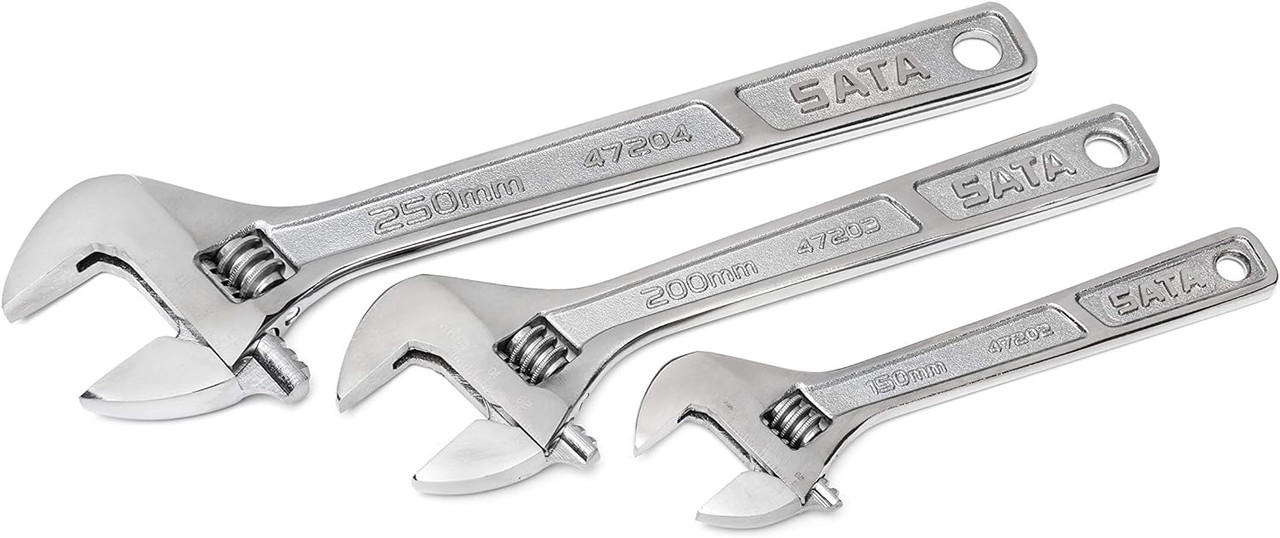
Necessary for tackling bolts and nuts that are inaccessible with a socket, a set of combination wrenches (including both open-ended and box-ended) is essential. These tools provide the leverage and grip needed to manage tight spaces and ensure all connections are secure.
Gasket Scraper
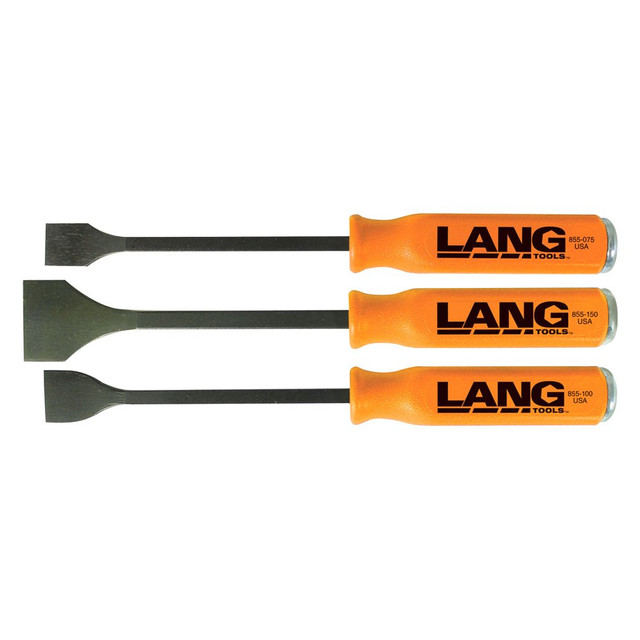
This tool is used to clean the engine block and cylinder head surfaces after removing the old gasket. A clean and smooth surface is crucial to prevent leaks and ensure the new head gasket adheres properly.
Coolant Drain Pan
When replacing a head gasket, draining the engine coolant is a necessary first step. A coolant drain pan collects the fluid efficiently, allowing for safe and environmentally friendly disposal or reuse.
How To Replace Head Gasket? Step-by-Step Guide
This step-by-step guide will help you confidently replace a blown head gasket, ensuring your vehicle's engine remains in top condition. Follow each step closely to prevent any issues and to successfully repair head gasket leak.
Step 1: Drain Fluids
The first step in the process is to drain all fluids that could interfere with the repair, specifically the engine oil and coolant. Place a suitable container under the vehicle to catch the fluid and ensure no environmental contamination occurs. Be sure to properly close and safely store the used fluids until they can be disposed of according to your local environmental regulations.
This preventative step is essential to avoid any spills or messes during the engine teardown, ensuring a clean workspace which is crucial when you are about to replace a head gasket.
Step 2: Remove Engine Components
To access the head gasket, you must remove several components from the engine. This generally includes the intake and exhaust manifolds, valve cover, and possibly the timing cover and associated belts or chains. Each part should be carefully removed and labeled if necessary to ensure correct reassembly.
Make sure to organize these components and their fasteners in a way that will make it easy to put everything back together. This organization is vital as it prevents confusion during reassembly after you replace the head gasket.
Step 3: Detach the Cylinder Head
With the preliminary components removed, you can now proceed to unbolt the cylinder head. Follow the vehicle manufacturer’s specified pattern for loosening the head bolts, which is typically done in a sequence to prevent warping or cracking. These specifications are crucial for maintaining the integrity of the engine block and head.
After the bolts are removed, carefully lift off the cylinder head to reveal the old head gasket. This step must be handled with care to avoid any damage to the engine block and the head surfaces.
Step 4: Remove the Old Head Gasket
The old head gasket can now be removed. This should be done gently to avoid any debris contaminating the engine interior. Inspect the old gasket to identify any breach points or signs of wear that could indicate additional underlying engine issues.
Clean the area where the old gasket was seated. It’s important to remove all remnants of the old gasket to ensure a clean and smooth surface for the new gasket to seal against. Any residue or debris can impair the seal and the engine’s performance.
Step 5: Clean and Inspect the Surfaces
It’s critical to thoroughly clean the mating surfaces of both the cylinder head and the engine block. Use a scraper designed for this purpose and be meticulous to avoid gouging the metal. These surfaces should be free of old gasket material, oil, and coolant. Inspect both surfaces for cracks or warping, which could compromise the effectiveness of the new head gasket.
If either is found, they must be professionally machined or replaced before continuing. A flat and smooth surface is crucial to ensure the new head gasket seals properly and functions as intended.
Step 6: Install the New Head Gasket
Position the new head gasket on the cleaned surface of the engine block, aligning it with all bolt holes and oil or coolant passages. It's imperative to position the gasket correctly to avoid misalignment, which could lead to leaks or poor engine performance.
Avoid using any sealant on the gasket unless it is explicitly specified by the gasket manufacturer or vehicle manufacturer. Improper use of sealant can compromise the gasket’s ability to seal and may lead to engine damage.
Step 7: Reattach the Cylinder Head
Carefully lower the cylinder head onto the block over the new head gasket, ensuring proper alignment. If required, apply new head bolts, as they are crucial for maintaining the specified torque and pressure on the gasket.
Tighten the bolts in the specified order and to the correct torque as per the manufacturer's guidelines. This is critical to prevent uneven pressure distribution or warping, which could compromise the head gasket seal.
Step 8: Reassemble the Engine
Begin reattaching all previously removed components. Reconnect the intake and exhaust manifolds, valve cover, and any other parts that were removed during the head gasket replacement process. Double-check each connection and fastener to ensure everything is secure and correctly positioned. This detailed reassembly ensures that the engine will run smoothly and maintains structural integrity, preventing issues that can arise from incorrect assembly after you replace head gasket.
Step 9: Refill Fluids
Refill the engine with fresh engine oil and coolant. It's important to use the types and quantities specified by the vehicle manufacturer to ensure optimal engine performance and protection. After refilling, start the engine in a well-ventilated area and allow it to reach normal operating temperature. Check for any signs of leaks or unusual noises, which could indicate an issue with the reassembly or the newly replaced head gasket.
Step 10: Check for Leaks
After the engine has reached operating temperature, shut it off and inspect for any leaks around the head gasket and other critical areas. Additionally, monitor the engine temperature and oil pressure over the next few days to ensure everything is operating as expected. This thorough final check is essential to ensure that the head gasket replacement was successful and that your vehicle will continue to operate reliably.
How much does it cost to replace head gasket?
The cost to replace a blown head gasket can vary significantly depending on several factors, including the vehicle's make and model, the complexity of the engine, and regional labor rates. Typically, the parts themselves are not excessively expensive, ranging from $20 to $200. However, the labor costs can be substantial due to the intensive nature of the repair, often requiring between 10 to 20 hours of work at rates that can vary from $50 to $150 per hour.
Additional costs may also accrue if there are other related issues to address, such as repair head gasket leak that has led to engine damage. When a head gasket fails, it can sometimes cause warping or cracking of the cylinder head, which might necessitate machining or replacement. Overall, you can expect the total expense to generally fall between $1,000 and $2,500, with higher costs possible for luxury or performance vehicles.
FAQs
1. Can you replace head gasket without removing engine?
Yes, you can replace a blown head gasket without removing the entire engine. The process involves disassembling the top portion of the engine to access the gasket. This method is less invasive and can reduce repair time and cost.
2. How often to replace head gasket?
Typically, you don’t need to replace a blown head gasket unless there are clear signs of failure. Unlike other vehicle components, there is no regular schedule for replacing them; it depends entirely on the vehicle’s condition and usage. Addressing overheating issues and maintaining the cooling system can help prevent failure.
3. What is average cost to replace head gasket?
The average cost to replace a blown head gasket can range from $1,000 to $2,500, depending on the vehicle make and model. This price includes both labor, which is extensive, and the parts needed for the repair. Additional engine damage can increase these costs significantly.
Shop Discounted Tools To Replace A Head Gasket With JB Tools
Get your tools for repairing a head gasket leak or replacing a blown head gasket without overspending by shopping at JB Tools. We offer a diverse selection of high-quality, discounted tools specifically suited for the task of replacing a blown head gasket. From precise torque wrenches to comprehensive socket sets, our tools provide the reliability you need to get the job done right.
At JB Tools, affordability meets quality, ensuring you can tackle your head gasket replacement or repair head gasket leaks effectively. Whether you're a seasoned mechanic or tackling this repair for the first time, find everything you need in one place. Shop with us and save on essential tools for a successful repair.